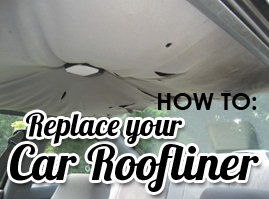
How To Replace Car Headlining/Roofliner
How To Replace Car Headlining/Roofliner
Headlining is the material that lines the inside of your car roof. Over time, due to age and exposure to moisture or extreme heat, this fabric can start to peel or sag. In addition to being an eyesore and affecting the resale value of your vehicle, it can also present a significant safety hazard.
Having your car headlining replaced by a professional can cost anywhere from $250.00 to $400.00.
However with the right products and some straightforward advice, you can complete this simple project yourself for approximately $90.00 saving yourself a substantial amount of money.
OTHER THINGS YOU MIGHT NEED
Apart from the products available from www.homeupholsterer.com.au you may also require:
- Bristle brush or light sandpaper
- Screwdrivers
STEP-BY-STEP INSTRUCTIONS
1. Remove the existing headlining
- Remove all the trim surrounding the headlining
- Unscrew/remove any items attached to the headlining including: sun visors, rear-view mirror, grab handles, dome lights
- Unclip clips/fasteners that are holding the headlining board in place
- Remove side trim panels (take extra care as plastic panels can easily break)
- Carefully remove front and rear trim panels
- Slide the headlining board out of the vehicle (ensuring to this carefully and with enough clearance so not to damage the board).
- Set the board on a flat work surface.
- Peel off the old material from the car headlining board
2. Remove the old foam and glue
- Use a bristle brush or lightweight sandpaper to scrape the remaining foam off the headlining board.
Tip: Be gentle but thorough as this will affect the overall finish of your new headlining
3. Prepare the new headlining velour material
- Spread your new headlining velour fabric over the headlining board (with the foam side lying against the board and the fabric facing up)
- Ensure that you have smoothed out any folds or wrinkles
4. Gluing the fabric to the board
Tip: Be very careful – the adhesive bonds on contact – so once glued the two surfaces will begin to stick immediately.
- Complete the adhesive process in two parts, by gluing half the fabric at a time.
- To do this, fold half of the headlining velour fabric back onto itself, leaving half of the headlining board exposed
- Evenly spray the back of the headlining fabric as well as the exposed half headlining board in a sweeping side to side motion
- Gently stretch the adhesive coated fabric over the board, pressing and smoothing it with the palm of your hand
- Repeat the gluing and attaching steps with the remaining half
- Give the completed board a rub with the palms of your hands, to ensure all areas have adhered
Tip: Make sure your hands are clean
- Wait for the adhesive to dry
5. Cut the new headlining
- Turn the board over
- Using a sharp Stanley knife, carefully trim excess fabric from the around edges of the board. Allow for a 1.5cm border of fabric to tuck in during installation.
- Next, cut holes in the car headliner where the lights, seat belts, visors and clothes hangers need to be attached.
- Glue borders/overlapping material to back of board
- Wait for the adhesive to dry
6. Reinstall headlining in car
- Reinstall the headlining board in the vehicle
- Secure the headlining with the car's clips (if applicable)
- Replace all the panels, trim and accessories that you removed in the beginning
For more advice about the products needed to replace your car rooflining / headliner material, visit us at our Sydney showroom and warehouse, or order online for shipping around Australia.

